Connecting your domain to Hostinger is a crucial step for launching your website. It allows your visitors to see your site when they type your domain name. Many beginners find this process confusing, but it’s easier than it looks. This guide will help you connect your domain to Hostinger and avoid common mistakes.
You’ll see practical examples, tables, and simple instructions to make everything clear.
What You Need Before Connecting
Before you start, make sure you have:
- A domain name (from any registrar, like GoDaddy or Namecheap)
- A Hostinger hosting account
- Access to your domain registrar’s control panel
If you bought your domain from Hostinger, it’s already connected. If not, you must update your nameservers or set up DNS records.
Step-by-step: Connecting Domain To Hostinger
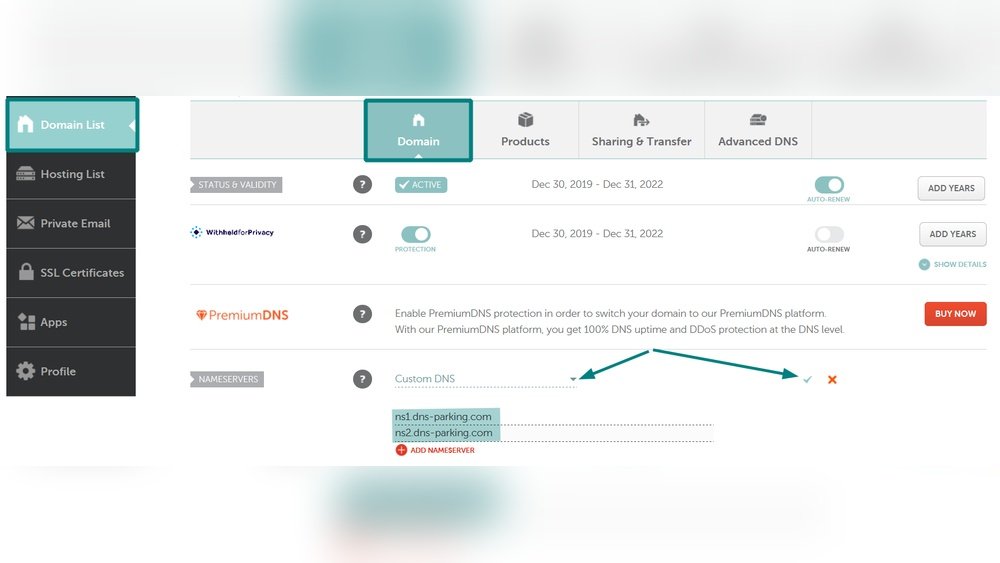
Most domains need to use Hostinger’s nameservers. Here’s how:
- Log in to your Hostinger account.
- Find your hosting details. Hostinger’s nameservers look like this:
- Ns1.dns-parking.com
- Ns2.dns-parking.com
- Log in to your domain registrar.
- Locate the domain management section.
- Replace your current nameservers with Hostinger’s nameservers.
- Save changes. DNS updates may take up to 24 hours.
Here’s a comparison between popular registrars and their domain management location:
| Registrar | Domain Management Path |
|---|---|
| GoDaddy | My Products > Domains > Manage |
| Namecheap | Dashboard > Domain List > Manage |
| Google Domains | My Domains > DNS |
Credit: help.shopify.com
Alternative: Using Dns Records
If you want to keep your domain’s email or other services, update A record only. This points your domain to Hostinger’s IP address.
- Get your Hostinger server IP from the dashboard.
- In your domain registrar, find the DNS settings.
- Edit the A record to use Hostinger’s IP.
- Save changes.
Here’s a quick comparison:
| Method | Best For | Setup Time |
|---|---|---|
| Nameserver | Full website control | 5-10 minutes |
| A record | Email services kept | 5-10 minutes |
Common Mistakes To Avoid
- Mixing up nameservers and DNS records.
- Forgetting to save changes.
- Not waiting for DNS propagation (can take up to 24 hours).
- Entering wrong Hostinger details.
Many beginners skip the DNS propagation step. Don’t worry if your site doesn’t show immediately—it’s normal.

Credit: www.hostinger.com
Final Steps
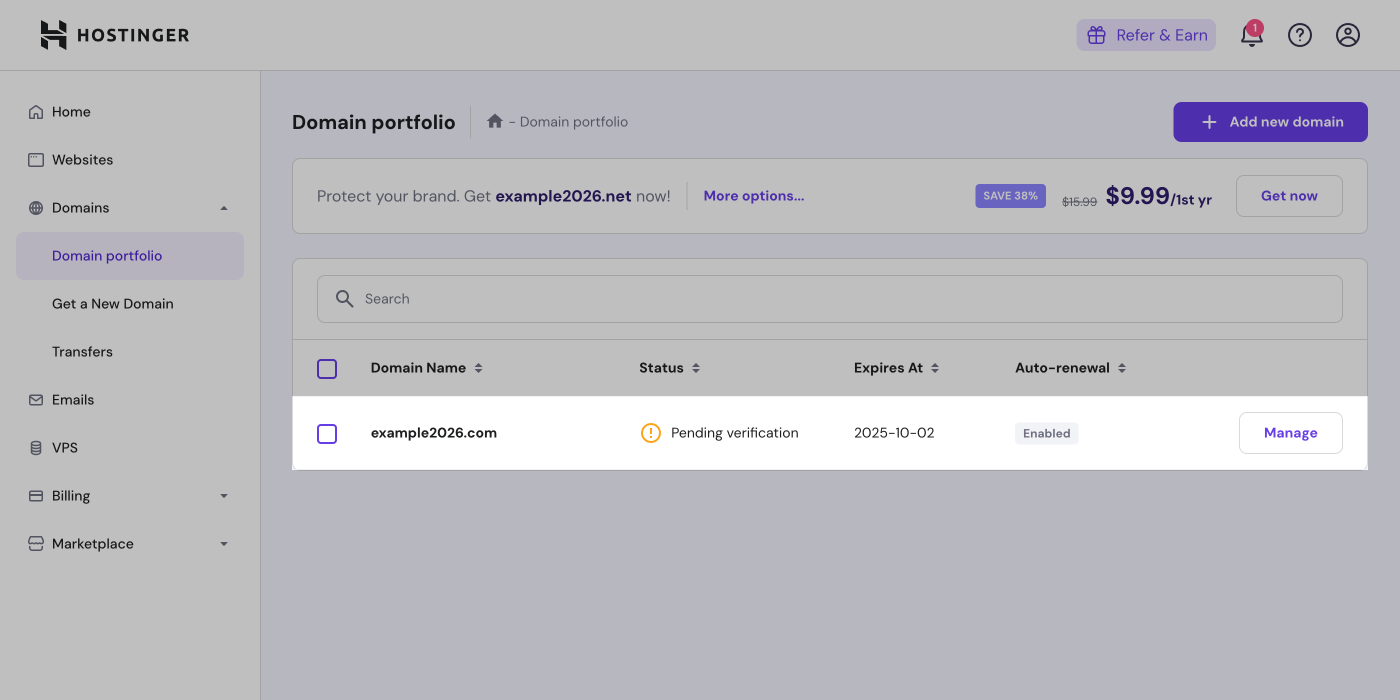
After updating your settings, check your website by typing your domain into a browser. If you see Hostinger’s default page or your website, the connection worked. For more details, visit Hostinger’s official tutorial.
Frequently Asked Questions
How Long Does Dns Propagation Take?
DNS changes can take 24–48 hours to update worldwide, but most see changes in a few hours.
Can I Use My Domain Email With Hostinger?
Yes, but use A record instead of changing nameservers if you want to keep your current email provider.
What Happens If I Enter The Wrong Nameservers?
Your domain won’t connect. Always double-check Hostinger’s nameservers in your dashboard.
Do I Need To Buy A Domain From Hostinger?
No, you can use any domain registrar. Hostinger supports domains from all major providers.
How Do I Know If My Domain Is Connected?
Type your domain into a browser. If you see your website or Hostinger’s default page, your domain is connected.

Credit: www.youtube.com