To use the Clickfunnels Plugin in WordPress, first install and activate the plugin. Then, connect your Clickfunnels account through the plugin settings.
The Clickfunnels Plugin allows seamless integration of Clickfunnels with your WordPress site. This powerful tool enhances your website’s functionality by embedding funnels directly into your WordPress pages. Installation is straightforward: simply download the plugin from the WordPress repository, activate it, and link it to your Clickfunnels account.
Once connected, you can easily add Clickfunnels pages to your WordPress site using shortcodes. This integration ensures that your marketing funnels operate smoothly, providing an efficient way to manage and optimize your sales strategies. It’s an essential plugin for anyone looking to streamline their online marketing efforts while leveraging the robust features of both platforms.

Credit: m.youtube.com
Introduction To Clickfunnels
Clickfunnels is a powerful tool for building sales funnels. It integrates seamlessly with WordPress, enhancing your website’s capabilities. This plugin simplifies creating landing pages and sales funnels.
What Is Clickfunnels?
Clickfunnels is a platform designed to help businesses sell products and services online. It offers an easy-to-use interface for building sales funnels. It includes tools for creating landing pages, sales pages, and checkout pages.
This platform enables users to manage their entire sales process. You can track customer interactions and optimize your sales funnel. It is a comprehensive solution for online sales and marketing.
Benefits Of Using Clickfunnels
- Easy to Use: The drag-and-drop builder requires no coding skills.
- Time-Saving: Pre-built templates help you get started quickly.
- Integrated Payment Options: Supports various payment gateways.
- Analytics: Provides detailed insights into your funnel’s performance.
- Automation: Automate emails and follow-ups with ease.
| Feature | Description |
|---|---|
| Drag-and-Drop Builder | Allows easy customization without coding. |
| Pre-built Templates | Offers a variety of designs to choose from. |
| Payment Integration | Works with multiple payment gateways. |
| Analytics | Tracks and reports funnel performance. |
| Email Automation | Simplifies follow-ups and customer engagement. |

Credit: supplygem.com
Getting Started
Ready to enhance your WordPress site with ClickFunnels? This guide will help you get started. We’ll cover the prerequisites and how to install WordPress for seamless integration.
Prerequisites
Before diving into the integration process, ensure you have the following:
- WordPress installed on your website.
- Active ClickFunnels account with access to the plugin.
- Basic understanding of WordPress dashboard navigation.
Installing WordPress
If you don’t have WordPress installed, follow these steps:
- Visit the WordPress download page.
- Download the latest version of WordPress.
- Upload the WordPress files to your web server using FTP or your hosting provider’s file manager.
- Create a MySQL database for WordPress on your web server.
- Run the WordPress installation script by accessing your site in a web browser. This is usually
http://yourdomain.com/wp-admin/install.php.
After completing these steps, your WordPress site should be up and running.
Now, you’re ready to integrate ClickFunnels and take your site to the next level!
Installing Clickfunnels Plugin
Installing the Clickfunnels Plugin in WordPress is a straightforward process. By following these steps, you can quickly integrate Clickfunnels into your WordPress site. This will allow you to create and manage landing pages, funnels, and more directly from your WordPress dashboard.
Downloading The Plugin
First, you need to download the Clickfunnels Plugin. Follow these steps:
- Go to the official Clickfunnels website.
- Navigate to the Plugins section.
- Find the Clickfunnels WordPress Plugin.
- Click the Download button to save the plugin file.
Uploading The Plugin To WordPress
Next, you will upload the downloaded plugin to WordPress:
- Log in to your WordPress dashboard.
- Navigate to Plugins > Add New.
- Click the Upload Plugin button at the top.
- Select the downloaded plugin file from your computer.
- Click Install Now.
- Once installed, click Activate Plugin.
After activation, you can configure the plugin settings. This will help you seamlessly integrate your Clickfunnels account with WordPress.

Credit: supplygem.com
Configuring The Plugin
After installing the Clickfunnels plugin in WordPress, the next step is configuring it. Proper configuration ensures smooth functioning and integration with your Clickfunnels account. Let’s walk through the essential steps to configure the plugin effectively.
Initial Setup
First, navigate to the WordPress dashboard. Locate the Clickfunnels plugin in the menu. Click on it to open the settings page.
- Select the Settings option.
- Enter the required details like your domain and site name.
- Save your changes.
Ensure the domain matches your Clickfunnels domain. This prevents any issues later.
Api Integration
API integration is crucial for syncing WordPress with your Clickfunnels account. Follow these steps to set it up:
- Login to your Clickfunnels account.
- Navigate to the Account Settings.
- Locate the API Key section.
- Copy the API Key.
Return to your WordPress dashboard. Paste the API Key into the plugin’s API settings field.
| Field | Description |
|---|---|
| API Key | Your unique integration key from Clickfunnels. |
| Domain | Your Clickfunnels domain. |
Save your settings. Your WordPress site is now connected to Clickfunnels.
Creating Sales Funnels
Creating sales funnels in WordPress using the Clickfunnels plugin is simple. Sales funnels help convert visitors into leads and customers. This process involves several steps. The Clickfunnels plugin streamlines these steps.
Building Your First Funnel
To build your first funnel, install and activate the Clickfunnels plugin. Follow these steps:
- Go to your WordPress dashboard.
- Click on the Clickfunnels tab.
- Select “Add New Funnel”.
- Choose a funnel type: Sales, Lead Generation, or Webinar.
- Enter a name for your funnel.
- Click “Create Funnel”.
Your first funnel is now created. Next, choose from the available templates.
Customizing Funnel Templates
Click on your new funnel to start customizing. Use these steps:
- Choose a template that fits your needs.
- Click “Edit Page” to customize the template.
- Use the drag-and-drop editor to add elements.
- Modify text, images, and buttons to match your brand.
- Save your changes.
Below is a table showing key elements you can customize:
| Element | Description |
|---|---|
| Headlines | Catchy titles to grab attention. |
| Images | Visual content to engage users. |
| Buttons | Call-to-action prompts. |
| Forms | Collect user information. |
Customizing funnel templates ensures your funnel aligns with your goals. Keep testing to improve performance.
Optimizing Funnels
Optimizing your funnels is crucial for maximizing conversions and boosting sales. With the Clickfunnels plugin in WordPress, you can easily improve your funnel performance. This section covers A/B testing and analyzing funnel performance.
A/b Testing
A/B testing allows you to compare two versions of a funnel. You can determine which version performs better. Follow these steps to set up A/B testing:
- Create two versions of your funnel page.
- Use the Clickfunnels plugin to set up the test.
- Track the performance of each version.
Key elements to test include:
- Headlines
- Call-to-action buttons
- Images
- Product descriptions
By testing these elements, you can identify what works best. Always test one element at a time for clear results.
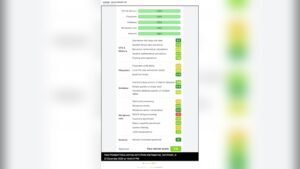
Analyzing Funnel Performance
Analyzing your funnel performance helps you understand user behavior. This allows you to make informed decisions. Use the Clickfunnels analytics dashboard for this purpose. Here are steps to analyze funnel performance:
- Navigate to the analytics section in Clickfunnels.
- Review metrics such as conversion rates and bounce rates.
- Identify pages where users drop off.
Focus on key metrics like:
- Conversion rate: Percentage of visitors who complete the desired action.
- Bounce rate: Percentage of visitors who leave after viewing one page.
- Average time on page: How long visitors spend on your funnel pages.
Track these metrics regularly. They help you spot trends and make necessary adjustments. Consistent analysis ensures your funnels remain effective.
Troubleshooting
Using the Clickfunnels plugin in WordPress can sometimes pose challenges. It helps to know how to troubleshoot common issues. This section will guide you through some of the common problems and how to seek support if needed.
Common Issues
1. Plugin not activating: Ensure your plugin is correctly installed. Go to Plugins > Installed Plugins and check if Clickfunnels is listed.
2. Page not displaying correctly: Clear your browser cache. Update your WordPress theme and plugins.
3. Slow loading times: Check your hosting server. You may need to upgrade your hosting plan.
4. Integration problems: Ensure you have entered the correct API keys. Check for any typos or missing characters.
Seeking Support
If the above steps do not resolve your issues, seek support from the Clickfunnels team. Use the following methods to contact support:
- Visit the Clickfunnels Help Center.
- Submit a ticket through the Support Portal.
- Join the Clickfunnels Facebook Community for peer support.
You can also check the Clickfunnels Blog for detailed guides and troubleshooting tips.
For immediate issues, use the live chat option available on their website. This can provide quick solutions.
| Support Option | Availability |
|---|---|
| Help Center | 24/7 |
| Support Portal | 24/7 |
| Facebook Community | Varies |
Remember to provide details about your issue. This helps the support team to assist you better.
Frequently Asked Questions
What Is Clickfunnels Plugin For WordPress?
Clickfunnels plugin integrates your sales funnels directly into your WordPress site, simplifying funnel management and enhancing user experience.
How To Install Clickfunnels Plugin?
Navigate to your WordPress dashboard, go to “Plugins,” click “Add New,” search for “Clickfunnels,” and click “Install Now. “
Is Clickfunnels Plugin Free?
The Clickfunnels plugin itself is free, but you need a Clickfunnels account, which requires a subscription.
Can I Use Existing Funnels In WordPress?
Yes, you can easily embed your existing Clickfunnels funnels into your WordPress pages using shortcodes provided by the plugin.
How To Add A Funnel To A Page?
After installing the plugin, use the provided shortcodes to embed funnels into any WordPress page or post.
Does Clickfunnels Slow Down WordPress?
Properly configured, the Clickfunnels plugin should not significantly affect your WordPress site’s performance.
Are Clickfunnels And WordPress Compatible?
Yes, Clickfunnels and WordPress are fully compatible, allowing seamless integration of sales funnels into your website.
What Support Is Available For Clickfunnels Plugin?
Clickfunnels offers customer support and extensive documentation to help you troubleshoot and optimize the plugin’s use.
Conclusion
Mastering the Clickfunnels plugin in WordPress can elevate your online business. It’s user-friendly and integrates seamlessly. With this tool, you can build effective sales funnels easily. Follow the steps outlined in this guide to boost your conversions. Start leveraging the power of Clickfunnels in WordPress today.