Email marketing is essential for businesses. It helps engage customers and boost sales.
Aweber is a popular tool for this purpose. Aweber makes email marketing simple and effective. With its user-friendly features, even beginners can create professional campaigns. This blog post will guide you on how to use Aweber for your email marketing needs.
From setting up your account to sending your first email, we’ll cover all the basics. You’ll learn how to build your email list, design attractive newsletters, and track your campaign performance. Let’s dive into the world of Aweber and see how it can benefit your business. By the end, you’ll be ready to reach your audience with confidence.
Introduction To Aweber
Have you ever wondered how businesses keep in touch with their customers through email? They use tools like Aweber. Aweber is a popular email marketing tool that helps you send emails to many people at once. It’s like having a personal assistant for your email marketing needs. Let’s dive into what Aweber is and why you might want to use it.
What Is Aweber?
Aweber is an email marketing service that helps you create and send professional emails to your subscribers. Whether you are running a small blog, an online store, or a large company, Aweber can help you manage your email marketing efforts efficiently. It provides various templates and tools to ensure your emails look great and reach the right people.
Benefits Of Using Aweber
Now, you might be thinking, “Why should I use Aweber?” Well, there are several benefits:
- Easy to Use: Aweber is user-friendly, making it easy for beginners to create and send emails without any hassle.
- Automation: You can set up automated email sequences, saving you time and effort.
- Templates: It offers a variety of email templates, so you don’t have to start from scratch.
- Analytics: Aweber provides detailed reports on how your emails are performing, helping you make informed decisions.
- Integration: It integrates with many other tools and platforms, like WordPress, making your workflow smoother.
Imagine you have a small online store. You can use Aweber to send welcome emails to new customers, inform them about sales, and even send birthday wishes. This not only keeps your customers happy but also encourages them to buy more from you.
In conclusion, Aweber is a powerful tool for anyone looking to improve their email marketing. Whether you are a newbie or a seasoned marketer, Aweber has something to offer. So, why not give it a try and see how it can boost your email marketing efforts?
Setting Up Your Aweber Account
Are you ready to start email marketing with Aweber? Setting up your Aweber account is the first step. This guide will walk you through the process, ensuring you understand each stage. Let’s dive in!
Creating An Account
First, visit the Aweber website. Click on the “Get Started” button. Enter your name, email, and password. Choose a strong password for security. After filling out the form, click “Create Account”. You’ll receive a confirmation email. Open it and click the link to verify your email address.
Navigating The Dashboard
After logging in, you’ll see the Aweber dashboard. The dashboard is your control center. Here, you can create and manage campaigns. On the left, you’ll find the main menu. It has options like Messages, Subscribers, and Reports.
Click “Messages” to create emails. Use “Subscribers” to manage your email list. “Reports” helps you track your campaign performance. Take some time to explore these features. Familiarizing yourself with the dashboard will make your email marketing journey smoother.
Building Your Email List
Creating an effective email marketing campaign starts with building a robust email list. Without a solid list of subscribers, your messages might just float into the digital abyss. That’s where Aweber comes in, making it a breeze to gather contacts and nurture them into loyal customers. Let’s dive into two key components of building your email list: importing contacts and creating sign-up forms.
Importing Contacts
Already have a list of contacts? Awesome! Aweber makes it super simple to import your existing contacts into their system. Whether you have a small list or a large one, you can easily get started.
Here’s how you can import your contacts:
- Prepare Your List: Ensure your contact list is in a CSV, TXT, or XLS file format. This keeps things organized and ready for upload.
- Login to Aweber: Navigate to your dashboard and find the ‘Subscribers’ tab.
- Import Subscribers: Click on ‘Add Subscribers’ and choose ‘Import Multiple’. Follow the prompts to upload your file.
- Map Fields: Aweber will ask you to match the columns in your file with the fields in their system. This step ensures that names, emails, and other details are correctly aligned.
- Review and Confirm: Double-check the details and click ‘Finish Import’. Your contacts will be added to your list, ready to receive your amazing content!
And just like that, you’re one step closer to email marketing success. Importing contacts into Aweber is as easy as pie!
Creating Sign-up Forms
Now that you have your initial contacts, it’s time to grow your list. One of the best ways to do this is by creating eye-catching sign-up forms. These forms invite visitors to subscribe to your emails, and Aweber provides user-friendly tools to create them.
Follow these steps to create an effective sign-up form:
- Access the Form Builder: In your Aweber dashboard, go to the ‘Sign Up Forms’ tab and click ‘Create A Sign Up Form’.
- Choose a Template: Aweber offers a variety of templates. Pick one that matches your brand’s style.
- Customize Your Form: Add your own text, images, and fields. Make sure to include a compelling headline and a clear call to action. For example, “Join our newsletter for exclusive updates!”
- Design and Settings: Adjust colors, fonts, and layout to match your website’s look. Don’t forget to set up the thank-you page that subscribers see after they sign up.
- Publish Your Form: Once you’re happy with the design, save it and get the code. You can embed this code on your website or share the form link on social media.
Creating sign-up forms with Aweber is straightforward. With a little creativity, you can attract new subscribers and grow your email list steadily.
Building your email list might seem daunting at first, but with Aweber’s intuitive tools and these simple steps, you’ll be well on your way to creating a thriving email community. Remember, the key to a successful email marketing campaign is a well-maintained and growing subscriber list. So, get started today and watch your audience grow!
Credit: blog.aweber.com
Designing Your Emails
Creating engaging and visually appealing emails is crucial for successful email marketing. Aweber offers a range of tools to help you design beautiful emails that capture your audience’s attention. Whether you’re a beginner or a pro, these tools make the process straightforward and enjoyable. Let’s dive into the key aspects of designing your emails using Aweber.
Using Templates
Aweber provides a variety of pre-designed templates that you can use to quickly create professional-looking emails. These templates are customizable and cater to different industries and purposes.
- Browse and Select: Go through the extensive library of templates and choose one that fits your brand and message.
- Easy to Use: The templates are designed to be user-friendly, so you don’t need any design skills to use them.
- Responsive Design: All templates are responsive, ensuring your emails look great on any device.
Using templates saves you time and ensures consistency in your email designs, making it easier to maintain a professional appearance.
Customizing Your Design
Once you’ve selected a template, it’s time to make it your own. Aweber’s customization options allow you to tailor your emails to reflect your brand’s unique identity.
- Drag-and-Drop Editor: Use the intuitive drag-and-drop editor to add, remove, or rearrange elements in your email.
- Personalize Content: Customize text, fonts, colors, and images to match your brand’s style. Remember, consistency is key!
- Include Branding: Add your logo and brand colors to make your emails instantly recognizable.
Customizing your design not only makes your emails more visually appealing but also helps in building a stronger connection with your audience. It’s like adding your personal touch to every email you send!
Designing your emails with Aweber is a breeze. By using templates and customizing your design, you can create stunning emails that resonate with your audience. So, why not give it a try and see the difference it can make in your email marketing efforts?
Creating An Email Campaign
Creating an email campaign with Aweber is a straightforward process. It helps you engage with your audience and boost your business. Let’s explore how to set up and schedule your email campaign.
Setting Up A Campaign
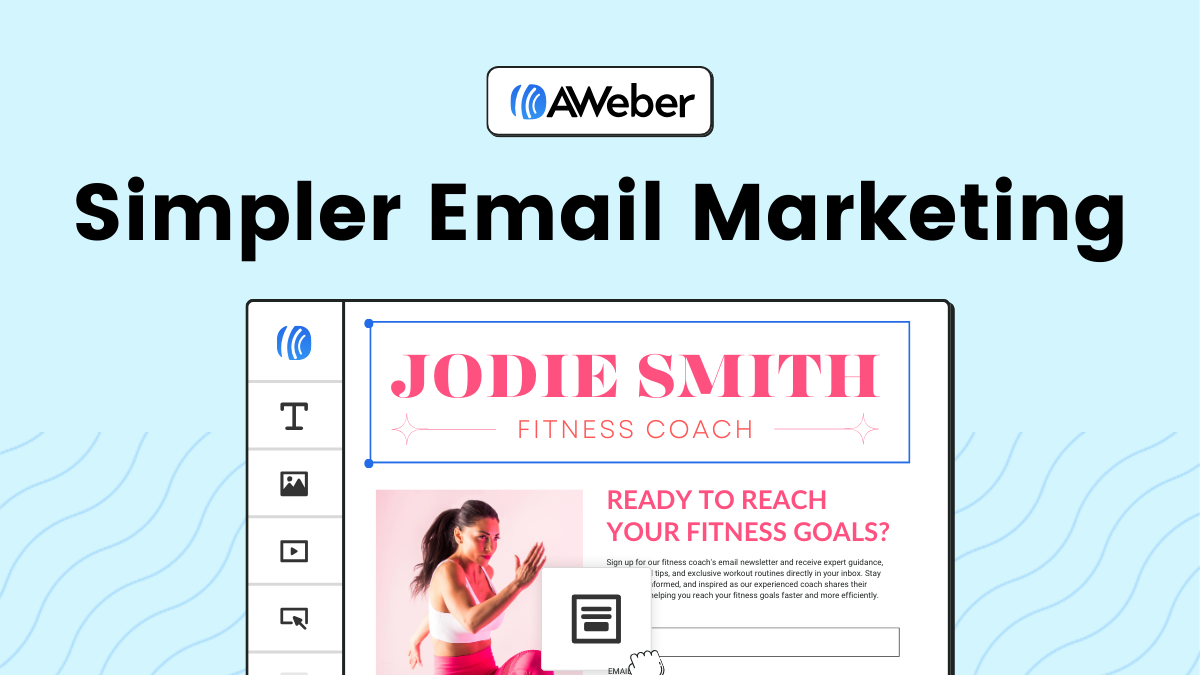
First, log in to your Aweber account. Go to the “Messages” tab. Click on “Create a Message” and choose “Drag & Drop Email Builder”. This tool is user-friendly. You can design your email with ease.
Next, add a catchy subject line. This grabs attention. Then, write your email content. Keep it clear and concise. Use bullet points to highlight key points. Add images to make it visually appealing.
Don’t forget to include a call to action. This encourages your readers to take the next step. Whether it’s visiting your website or making a purchase, be clear about what you want them to do.
Scheduling Your Emails
After creating your email, it’s time to schedule it. Go to the “Schedule” tab. Choose the date and time for your email to be sent. You can also set up a series of emails.
This is known as an autoresponder. It allows you to send emails automatically. You can set specific intervals between emails. This keeps your audience engaged over time.
Review your schedule before finalizing. Make sure the timing aligns with your audience’s habits. For instance, send emails in the morning if your audience is active early in the day.
Finally, click “Save & Exit”. Your email campaign is now ready to go. Aweber will take care of the rest. It’s that simple!
Credit: www.aweber.com
Segmenting Your Audience
Segmenting your audience is essential for effective email marketing. It helps in delivering personalized content to different groups. With AWeber, you can easily segment your audience. This increases engagement and improves conversion rates.
Creating Segments
Creating segments in AWeber is straightforward. First, log into your AWeber account. Navigate to the “Subscribers” section. Click on the “Manage Subscribers” tab. Here, you will find options to create new segments. You can filter subscribers based on various criteria. These criteria include sign-up date, location, or purchase history. Once you define the criteria, save the segment with a unique name. This helps you organize your audience efficiently.
Using Tags
Tags are another powerful feature in AWeber. They help in further refining your segments. You can assign tags to subscribers based on their actions. For example, tag users who opened a specific email. Or those who clicked on a particular link. To use tags, go to the “Subscribers” section. Click on a subscriber’s name to view their profile. Add or remove tags as needed. Tags allow you to create highly targeted email campaigns. This enhances the relevance of your messages.
Analyzing Your Results
Email marketing is a powerful tool, but its real strength lies in understanding how your campaigns perform. This is where analyzing your results comes into play. By looking at the data, you can see what works and what doesn’t, making your future campaigns more effective. Let’s dive into two key metrics you’ll want to track with Aweber: open rates and click-through rates.
Tracking Open Rates
Open rates tell you how many people opened your email. This is important because if no one opens your email, they can’t read your message. To track your open rates in Aweber, go to your Reports section. Here, you will see the percentage of people who opened your emails. A good open rate means your subject line and sender name are doing their job.
Here are some tips to improve your open rates:
- Write compelling subject lines: Make them short and interesting.
- Use a familiar sender name: People are more likely to open emails from names they recognize.
- Test different times: Send your emails at different times to see when your audience is most active.
Understanding Click-through Rates
Click-through rates (CTR) show you how many people clicked on the links in your email. This metric is crucial because it measures engagement. If people are clicking, they are interested in what you are offering. To check your CTR in Aweber, go to the Reports section and look for the click-through rate percentage.
Here are some ways to improve your click-through rates:
- Use clear and strong calls to action (CTAs): Tell your readers what you want them to do.
- Make your emails mobile-friendly: More people are reading emails on their phones, so make sure your links are easy to click on a small screen.
- Personalize your emails: Use the recipient’s name and tailor the content to their interests.
Remember, analyzing your results is not just about looking at numbers. It’s about understanding what those numbers mean and how you can use them to improve. By tracking your open rates and click-through rates in Aweber, you can fine-tune your email marketing strategy and achieve better results.
So, what are you waiting for? Start analyzing your email campaigns today and watch your engagement soar!
Best Practices For Email Marketing
Email marketing can be a powerful tool when done right. It allows you to connect with your audience directly, share valuable content, and drive engagement. However, it’s essential to follow best practices to ensure your emails are effective and not just another addition to the spam folder. Below, we’ll cover two critical aspects: writing engaging subject lines and personalizing your emails.
Writing Engaging Subject Lines
Subject lines are the first thing your readers see, and they can make or break your email campaign. Think of the subject line as the gatekeeper to your content. If it’s not compelling, your email will likely go unopened. Here are a few tips to craft engaging subject lines:
- Keep it short and sweet: Aim for 6-10 words. This keeps it concise and ensures it displays well on mobile devices.
- Use action words: Words like “Discover,” “Learn,” or “Join” can prompt immediate action.
- Make it personal: Including the recipient’s name can increase open rates significantly.
- Create urgency: Phrases like “Limited Time Offer” or “Last Chance” encourage immediate action.
For example, instead of a generic subject line like “Newsletter Update,” try something more engaging like “Discover Our Latest Tips for Email Marketing Success!”
Personalizing Your Emails
Personalization goes beyond just adding a recipient’s name in the subject line. It’s about making your emails feel relevant and tailored to the individual reader. Here are some ways to personalize your emails effectively:
- Segment your audience: Group your subscribers based on interests, behavior, or demographics. This helps you send more targeted and relevant content.
- Use dynamic content: Customize parts of your email content based on the recipient’s preferences or past interactions.
- Send personalized recommendations: Suggest products or content based on the recipient’s previous purchases or activity on your site.
- Write in a conversational tone: Make your emails sound like they’re coming from a friend, not a corporation.
Personalization can significantly improve your email performance. For instance, I once segmented my audience based on their interests and saw a 30% increase in engagement rates. It’s like having a conversation with each subscriber, making them feel valued and understood.
Remember, the goal is to make your subscribers feel like your emails were crafted just for them. When done right, personalization can turn a simple email into a powerful tool for building relationships and driving conversions.

Credit: www.youtube.com
Frequently Asked Questions
How To Set Up An Email Campaign In Aweber?
Log in to AWeber, create a new list, and design your email. Add subscribers and schedule the campaign.
What Is The 80/20 Rule In Email Marketing?
The 80/20 rule in email marketing means 80% of your content should be valuable to the reader, while 20% can be promotional. This helps keep subscribers engaged and increases the chances of conversions.
What Is The Difference Between Mailchimp And Aweber?
MailChimp offers a free plan and advanced automation. AWeber provides better customer support and simpler email marketing tools. Both are popular for email marketing.
What Are The 5 T’s Of Email Marketing?
The 5 T’s of email marketing are Targeting, Timing, Testing, Tracking, and Technique. Target your audience accurately. Send emails at the right time. Test different strategies. Track performance metrics. Use effective techniques.
Conclusion
Aweber simplifies email marketing for everyone. Its user-friendly interface makes setup easy. You can create beautiful emails quickly. Automation features save time and boost engagement. Detailed analytics help you understand your audience better. With Aweber, you can grow your email list effortlessly.
Follow these steps to get started today. Remember, consistency is key. So, keep refining your strategy. Your email marketing success is just around the corner.