To start a Shopify store, sign up for a Shopify account and choose a suitable plan. Then, customize your store and add products.
Starting a Shopify store can be an exciting venture for beginners. Shopify is a user-friendly platform that simplifies setting up an online store. First, you must sign up on the Shopify website and select a plan that fits your budget and business needs.
Once registered, you can personalize your store by choosing a theme and customizing it according to your brand’s identity. Adding products is straightforward; you can provide detailed descriptions, images, and pricing. Shopify also offers various apps to enhance your store’s functionality. You can quickly launch your online store and start selling with these steps.
Introduction To Shopify
Starting an online store can be exciting yet challenging for beginners. Shopify offers a simple solution. It’s a platform for building online stores and helping you manage your online business. This section will introduce you to Shopify.
Credit: soft-loft.com
Setting Up Your Shopify Account
Starting a Shopify store is an exciting journey. The first step is setting up your Shopify account. This section will guide you through the essential steps to get your store up and running. Follow these instructions to create an account and choose the right plan for your business.
Creating An Account
To start, visit the Shopify website. Click on the “Start free trial” button. You will be asked to enter your email address, password, and store name. Make sure your store name is unique and reflects your brand.
After entering your details, click the “Create your store” button. Shopify will guide you through a few more setup steps. You will need to enter your personal information and business details. Fill out these forms accurately to avoid issues later.
Once completed, you will have access to your Shopify dashboard. This is where you will manage everything about your store. Take a moment to explore the dashboard and familiarize yourself with its features.
Choosing A Plan
Shopify offers several plans to fit different business needs. Here is a brief overview:
| Plan | Monthly Cost | Features |
|---|---|---|
| Basic Shopify | $29 | All basic tools for starting a new business. |
| Shopify | $79 | Features for growing businesses and higher sales volume. |
| Advanced Shopify | $299 | Advanced features for scaling businesses. |
Consider your business size and goals before choosing a plan. The Basic Shopify plan is excellent for beginners. The Shopify plan suits growing businesses. Advanced Shopify is for scaling businesses needing advanced features.
To select a plan:
- Go to your dashboard’s “Settings” section.
- Click on “Account” and then “Compare plans.”
- Review the options and choose the best plan for your needs.
- Click “Select” to confirm your choice.
Remember, you can upgrade or downgrade your plan as your business grows. Shopify offers flexibility to match your business needs.
Customizing Your Store
Customizing your Shopify store makes it unique. You get to show off your brand. This is crucial for attracting and keeping customers. Let’s dive into how to make your store shine.
Selecting A Theme
Selecting a suitable theme is very important. A theme affects your store’s look and feel. Shopify offers free and paid themes. You can find them in the Shopify Theme Store.
Here is a simple guide to choosing a theme:
- Go to your Shopify admin.
- Click on Online Store.
- Select Themes.
- Browse the available themes.
- Pick one that suits your brand.
Make sure the theme is mobile-friendly. Many people shop on their phones. Also, check if it has good reviews. A well-reviewed theme is usually reliable
Adding A Logo And Branding
Your logo and branding are key. They make your store look professional. They also help customers recognize your brand. Here’s how to add a logo to your Shopify store:
- Go to your Shopify admin.
- Click on Online Store.
- Select Themes.
- Click on Customize.
- Find the Header section.
- Click Upload Image to add your logo.
Besides the logo, think about colors and fonts. These should match your brand. You can customize these in the theme settings. Consistent branding builds trust with your customers.

Credit: www.pinterest.com
Adding Products
Adding products is a crucial step in setting up your Shopify store. This process ensures your customers see what you offer. Let’s break it down into manageable steps.
Creating Product Listings
Start by navigating to your Shopify admin panel. Click on “Products” and then “Add product.” You’ll be directed to a new page to enter product details.
- Title: Give your product a clear, descriptive title.
- Description: Write a compelling description highlighting key features and benefits.
- Images: Upload high-quality images showcasing your product from different angles.
- Pricing: Set a competitive price for your product.
Please complete all necessary fields to provide as much information as possible. This will help customers make informed decisions.
Managing Inventory
Managing your inventory ensures you never run out of stock. Scroll down to the “Inventory” section on the product listing page.
- Enable “Track quantity” to monitor stock levels.
- Set “Quantity” to the number of items you have in stock.
- Select ” Continue selling when out of stock ” to decide if you want to allow customers to purchase items when they are out of stock.
Keeping your inventory updated prevents overselling and keeps customers happy.
Here’s a quick reference table to help you remember the key fields:
| Field | Description |
|---|---|
| Title | Product name, is clear and descriptive. |
| Description | Highlight key features and benefits. |
| Images | Upload high-quality photos. |
| Pricing | Set a competitive price. |
| Track quantity | Monitor stock levels. |
| Quantity | Enter the number of items in stock. |
Following these steps makes adding products to your Shopify store easy and efficient.
Setting Up Payment Methods
Setting up payment methods in Shopify is crucial for your online store. It ensures customers can pay easily and securely. This section will guide you through choosing payment gateways and setting up taxes.
Choosing Payment Gateways
Payment gateways are services that process credit card payments. Shopify supports many gateways to cater to global customers. The right gateway depends on your location and customers’ preferences.
Here are some popular options:
- Shopify Payments: This is Shopify’s payment gateway. It integrates seamlessly with your store. It supports major credit cards and has low transaction fees.
- PayPal: Widely used and trusted. Easy to set up and offers buyer protection.
- Stripe: Known for its simplicity and developer-friendly interface. It supports multiple currencies.
- Authorize.Net: A reliable option with advanced fraud detection features.
To set up a payment gateway:
- Go to your Shopify admin dashboard.
- Click on Settings and then Payments.
- Select your preferred gateway and click Activate.
- Follow the on-screen instructions to complete the setup.
Setting Up Taxes
Taxes are a critical part of running an online store. Shopify helps you automate tax calculations based on your location and customers’ locations.
To set up taxes:
- Navigate to Settings in your Shopify admin.
- Click on Taxes.
- Enter your store’s origin address.
- Set the tax rates for each region you sell to.
- Enable automatic tax calculations if available.
Here’s a quick reference table for common tax settings:
| Region | Tax Rate | Automatic Calculation |
|---|---|---|
| United States | Varies by state | Yes |
| Canada | 5-15% | Yes |
| European Union | 20-25% | Yes |
Setting up payment methods and taxes correctly ensures smooth transactions. It builds trust with your customers and keeps your store compliant.

Credit: skybootstrap.com
Configuring Shipping Options
Configuring shipping options is a crucial step in setting up your Shopify store. Proper shipping settings ensure smooth delivery and happy customers. Let’s dive into the details of configuring your shipping options.
Setting Shipping Rates
Setting shipping rates correctly is essential for your business. Accurate rates prevent unexpected costs for you and your customers. Follow these steps to set your shipping rates:
- Go to your Shopify admin panel.
- Click on Settings and then Shipping and Delivery.
- In the Shipping section, click on Manage Rates.
- Select the shipping profile you want to edit.
- Click on Add Rate.
- Enter the rate name, price, and conditions.
- Save your changes.
Consider different shipping methods to offer your customers:
- Free shipping
- Flat rate shipping
- Calculated shipping
Managing Shipping Zones
Shipping zones determine where your products can be shipped. Properly managing these zones ensures accurate delivery costs. Follow these steps to manage your shipping zones:
- Go to your Shopify admin panel.
- Click on Settings and then Shipping and Delivery.
- In the Shipping section, click on Manage Rates.
- Select the shipping profile you want to edit.
- Scroll down to the Shipping section.
- Click on Create shipping zone.
- Name the zone and select the countries or regions.
- Save your changes.
Consider creating different zones based on:
- Domestic shipping
- International shipping
- Specific regions or countries
Setting up shipping zones helps manage costs and delivery times.
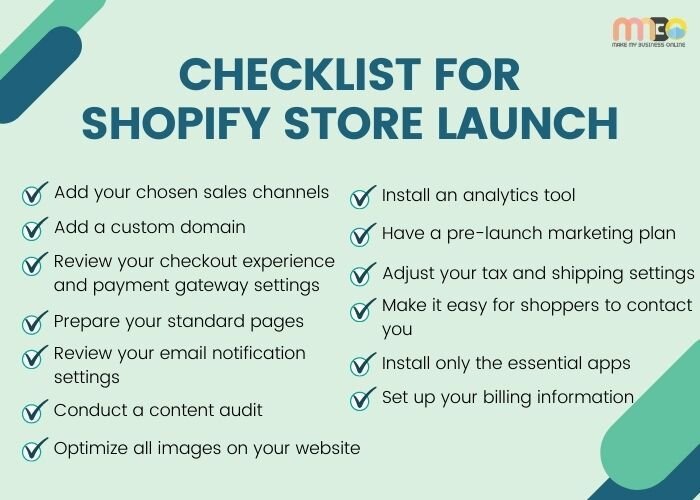
Launching Your Store
You’ve built your Shopify store and added your products. Now, it’s time to launch. This phase is crucial. It ensures everything works perfectly before customers visit. Follow these steps to make your launch smooth and successful.
Testing Your Store
Before you go live, test everything. Make sure all features work seamlessly.
- Test your checkout process: Ensure customers can complete purchases without issues.
- Check product pages: Verify all images, descriptions, and prices are accurate.
- Mobile responsiveness: Ensure your store looks good on all devices.
Testing helps catch errors early. This ensures a smooth shopping experience for your customers.
Publishing Your Store
Once you’ve tested your store, it’s time to publish. Follow these steps:
- Go to your Shopify admin: Click on the “Online Store” tab.
- Review your settings: Ensure all settings are correct.
- Click “Publish”: Make your store live for the world to see.
Publishing is a significant step. It marks the beginning of your online business journey.
Marketing Your Store
Marketing your Shopify store is crucial for attracting customers and driving sales. By using effective marketing strategies, you can reach a wider audience and increase your revenue. In this section, we will explore two essential marketing tactics: Social Media Marketing and Email Marketing.
Social Media Marketing
Social media is a powerful tool for promoting your Shopify store. Platforms like Facebook, Instagram, and Twitter can help you connect with potential customers.
- Create engaging posts about your products.
- Use high-quality images and videos.
- Interact with your followers by responding to comments and messages.
- Utilize hashtags to reach a broader audience.
- Run targeted ads to attract specific groups of people.
Consistency is key. Post regularly and keep your audience engaged. Collaborate with influencers to expand your reach. Track your performance using social media analytics tools.
Email Marketing
Email marketing helps you stay in touch with your customers. Sending regular newsletters can keep your audience informed about new products and promotions.
Here are some tips for effective email marketing:
- Collect email addresses through your website and social media.
- Segment your email list based on customer behavior.
- Personalize your emails to make them more engaging.
- Use catchy subject lines to increase open rates.
- Include clear call-to-actions to drive conversions.
Automate your email campaigns to save time and ensure consistency. Use tools like Mailchimp or Klaviyo for better results. Analyze your email marketing performance and adjust your strategy accordingly.
| Social Media Marketing | Email Marketing |
|---|---|
| Engaging posts | Regular newsletters |
| High-quality images | Personalized emails |
| Hashtags | Catchy subject lines |
| Targeted ads | Clear call-to-action |
Frequently Asked Questions
How Do I Set Up A Shopify Store?
To set up a Shopify store, sign up on Shopify’s website. Choose a plan, customize your store’s design, add products, and set up payment methods. Finally, launch your store and start selling.
Is Shopify Good For Beginners?
Yes, Shopify is beginner-friendly. It offers an intuitive interface, extensive tutorials, and customer support. The platform simplifies e-commerce, making it easy to set up and manage an online store.
How Much Does It Cost To Start A Shopify Store?
Shopify offers various plans starting at $29 per month. There are also additional costs for apps, themes, and domain registration. Choose a plan that fits your budget and needs.
Can I Sell Digital Products On Shopify?
Yes, you can sell digital products on Shopify. Use the Digital Downloads app to manage and deliver digital files to customers. This allows you to offer a variety of digital goods easily.
Conclusion
Starting a Shopify store is simple and rewarding. Follow the steps outlined to begin your e-commerce journey. Remember to stay consistent and keep learning. With dedication, your online store can thrive. Now, take the first step and turn your ideas into a successful business.